How To Change A G-tube In 6 Steps
All content on this blog is for informational purposes only. If you use any of this information — you do so with this website’s encouragement to communicate with licensed medical professionals when making decisions about your health, presumably having done your own research, and in full knowledge of this website’s policies.
So how DO you change a g-tube? Isn’t that gross? How can I just DO THAT without getting freaked out about it?
Oh, don’t go there. I DID freak about it. My husband did too. Before, during, and after changing our daughter’s g-tube for the first time we were super high on adrenaline. What if we hurt her? What if we damaged her stoma or the tube? Oh-em-gee, we are SO NOT qualified to do thissss— But we did.
It wasn’t hard. It was just weird to do. Because who wants to replace a piece of medical equipment that’s not only through the skin like an earring, but in their body— Oh, well, we do. We want to replace the equipment, because it’s our kiddo’s primary method of receiving nutrition.
So deal with it. I mean, don’t sweat it. My husband and I got brave. You’re brave too. Though it’s easier to already have a handle on what needs doing in the situation that a tube change comes, so read on. Or if you find yourself in need of help right now, help is here.
Step 1: G-tube Change Setup
Get the changing kit! It’s time to change the feeding tube according to schedule! Or, the g-tube fell out!

This is probably the only point to hurry, because a stoma (the hole where the stem of the g-tube goes in) with no feeding tube in it will close. A well-established stoma will not be an immediate issue, may still be fine at 2-4 hours without being in, and may not need dilation in an emergency room setting, but I still wouldn’t sit easy. A problematic or new stoma site, however, can close in under two minutes.
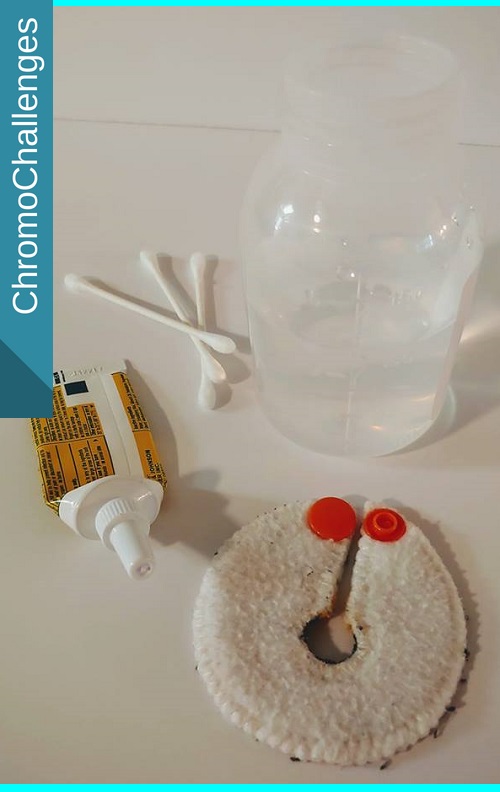
You will potentially need:
- Narrow balloon syringe
- New g-tube kit with appropriate size equipment
- Squeezable tube of Aquaphor or other lubricant
- About 3 Q-tips
- A rag to catch about 5 ml of old water
- A small cap of about 10 ml of fresh water (filtered, sterile, distilled)
- Neosporin or other antibiotic
- Nystatin
- Silver Nitrate sticks
- G-tube barrier cream (such as the G-tube Stoma Barrier Cream I assemble at home)
- Preferred cares dressings, such as gauze and tape or tubie pad
- Medical gloves
It’s definitely better for those items to be ready to go in a small kit or readily available prep area in your home. A shelf near a changing area works well.
Step 2: Old G-tube Out

The overall process of changing a g-tube isn’t gross. But the state you’ll find the used g-tube has reached when it comes out can be pretty grody.
If changing every three months on a schedule, the balloon and stem might only be a little discolored. If like many families you delay changing the tube until the tube expires on its own by popping or otherwise losing integrity, which on average does not surpass seven months, the difference can be at least a little eyebrow raising.
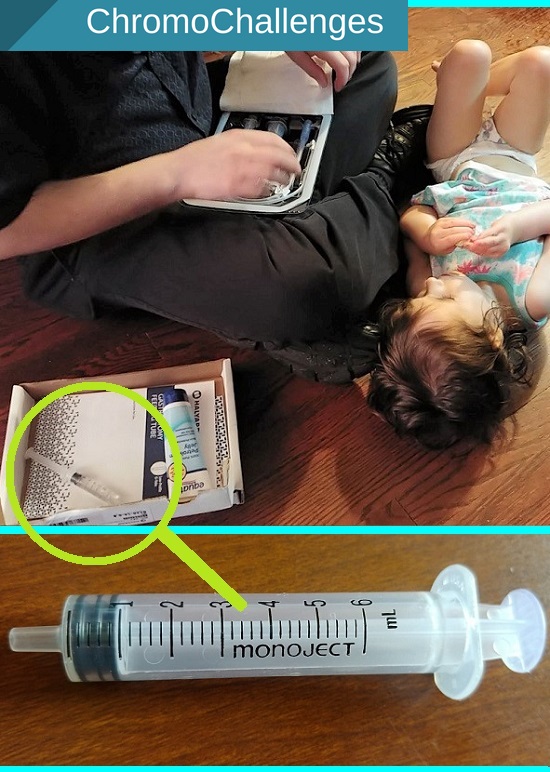
Notice the syringe that is in the green circle in the photos. That is the narrow balloon syringe. I don’t come across many of those except when we open a new g-tube kit, so be careful to collect that syringe to use for next time. Due to insurance restrictions, it’s great to keep syringes to rewash for future reuse generally.
If you need help removing water from the g-tube balloon:
Keep a hand holding the old tube flush with the skin — so as not to disturb the g-tube YET. Take the water OUT by still holding the old tube firmly, insert the balloon syringe into the side of the g-tube (balloon port), and pull old water into the syringe until it stops. The tube will loosen from the stoma entrance. After the tube’s balloon is entirely deflated, then you may remove the tube.
If there is resistance
A little resistance is okay, but the tube should slide right out easily. Any slight resistance would most likely be the girth of the deflated balloon moving past the small, well-healed stoma entrance.
A lot of resistance and pain indicates there is more going on with the stoma site than meets the eye. You might consider seeking additional medical help from your pediatrician if minor, urgent care if it’s not quite an emergency, or at the emergency room if severe.
Pain would indicate the possibilities of an internal abscess, prolapse, skin adhering to the g-tube, and/or improper healing or maintenance.
If the stoma is sore like the one pictured
Be ready to apply your chosen topical antibiotic during Step 5.
Aubby’s stoma is not typically sore as pictured, and because it fell out there is some food sticking around, but this photo came after having to stretch out the time between bath days during my post partum recuperation time after giving birth to her little brother. I had to wait for my husband to get home from work so I had extra hands able to lift her so she could be made bathtime fresh.
What else can make a g-tube sore like that? Toddlers might drop food or drink down their shirts, some individuals drool a LOT even past neckerchiefs, the tube may get pulled in crazy directions, and so on.

What helps keep a stoma looking better than that? Keep the area CLEAN — frequent baths (at least every other day). Keep the area DRY – Keep moistness away by using a tubie pad, and use barrier cream as needed.
Cleanliness is an obvious issue. But what does moisture do? Creates a yeast friendly environment – stomas should not have smells except for the soap, cleaning agent, or medicinal cream used.
And why do I keep talking about creams instead of ointments? Because my personal observation is that creams create a more barrier friendly environment. On the other hand, I’ve observed that ointments retain more moisture than creams and can keep sites irritated for longer periods of time if used past a day or two when wounds are fresh.
Step 3: G-tube Insertion
The stomach environment is not sterile, but it doesn’t hurt to use care in handling new g-tubes that are about to be inserted. The only part on a new g-tube my husband or I touch is the port where we plug tubes. We don’t touch the stem with the balloon piece that’s about to go in.
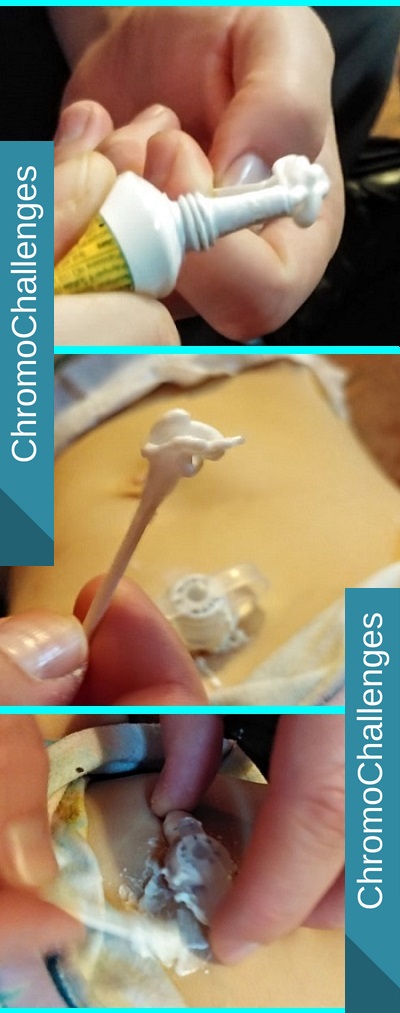
Before inserting the new g-tube into the stoma, lubricate the balloon with a squeezable tube of Aquahor or other lubricant. You might use a gloved hand or Q-tip to spread the lubricant.
After the g-tube stem is lubricated, line the end up with the stoma entrance. Using firm but gentle pressure, gently press the tube into the hole. If there is resistance, stop pressure and assess if you need to consider seeking additional medical help at an emergency room. If you meet no resistance, then hold the g-tube with one hand to keep it in and flush against the skin, and go to Step 4.
Step 4: Water in G-tube Balloon

Still holding the g-tube with one hand to keep it in and flush against the skin, use your other hand to draw about 5 ml of water from the cap of filtered water into the syringe, or have a helper draw the syringe up for you. It’s also entirely fine to pre-prep this step.
Holding the new tube firmly, insert the balloon syringe into the side of the g-tube (balloon port). Push water into the balloon until the tube’s firm against the skin, but not tight. You should have just enough room to roll a Q-tip under the side to apply an antibiotic if needed.
Holding the tube extra firmly, twist the syringe as you pull to remove it. The slight twist helps prevent pulling on the inserted tube.
Freshly Changed G-tube
Clean and beautiful to see, ain’t it? Congratulations, you changed the g-tube!
Check Placement

To check placement:
- Attach a tube to the port as usual.
- Draw back on a syringe to bring up residual (stomach contents). If you see anything other than you expect, there’s a problem.
What should you expect?
- Breastmilk color
- Formula color
- Or other food color that was given
- Medicine colors
- Nothing but air (been awhile since last feed)

What would be out of the ordinary?
- Dark green-brown with darker grains (stomach bleed)
- Neon green (possible intussusception)
- Neon yellow (possible intussusception)
IF THERE’S A PROBLEM, SEEK MEDICAL HELP AT THE EMERGENCY ROOM.
Step 5: Apply Meds To Stoma
After the feeding tube’s in, apply cares as needed:
- If there’s a smell, there may be yeast or a bath is required. Apply Nystatin if necessary.
- If the site’s sore and very red like the picture in Step 2, apply an antibiotic cream to get ahead of an infection and reduce redness.
- If the site’s rashy or irritated, apply a stoma barrier cream.
When applying a barrier cream, it doesn’t hurt to be generous.
To get meds under the tubie pad and port easier, roll the Q-tip under as you apply. Rolling the Q-tip keeps it from moving in a staggered way.
Likewise, if the stoma is sensitive, making small half-circle swipes instead of wiping with the Q-tip should help minimize pain.

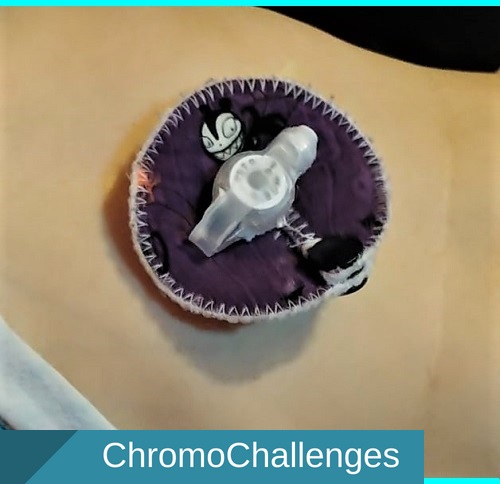
Step 6: Freshly changed G-Tube with Tubie Pad
After cares have been applied, collar the g-tube stem with a fresh tubie pad (such as those at Etsy by Fashiontubies).
It helps to slide one side of the tubie pad on at a time and to fit it just under the port so it goes over the cares that have been applied in Step 5. However, if the cares are disturbed, feel free to reapply as needed.
Finished!
All done! If you have any additional questions or need for clarification, send a message via the messenger in the ChromoChallenges Facebook group.


Do you tape down the tubie pad or the button?
After it’s well healed from surgery (about 6-10 weeks), no. It took my daughter about seven weeks.